java 파일
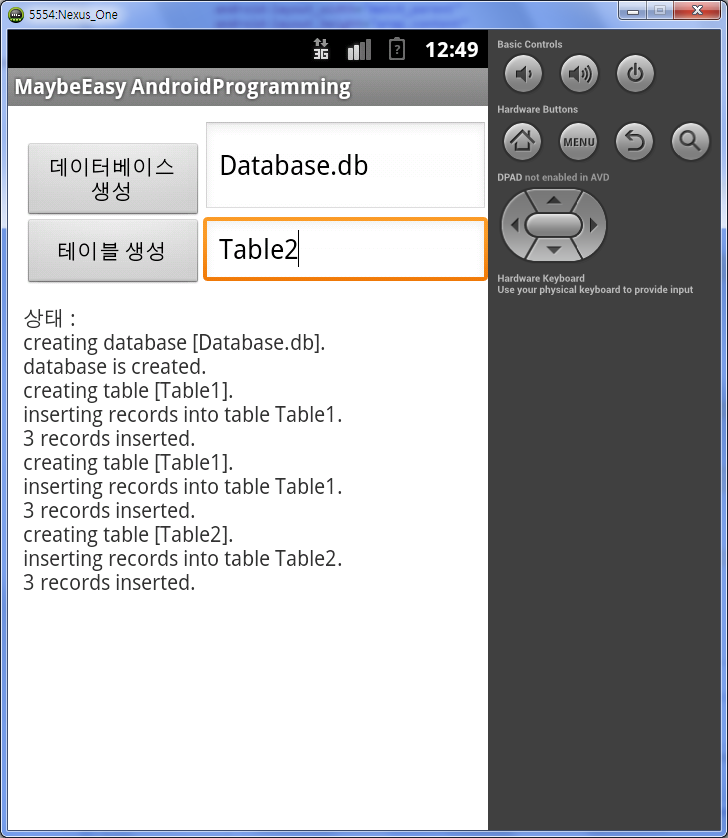
package naver.maybeeasyandroidprogramming; import android.app.Activity;import android.content.ContentValues;import android.database.sqlite.SQLiteDatabase;import android.os.Bundle;import android.util.Log;import android.view.Menu;import android.view.View;import android.view.View.OnClickListener;import android.widget.Button;import android.widget.EditText;import android.widget.TextView; public class MainActivity extends Activity { String databaseName; String tableName; TextView status; boolean databaseCreated = false; boolean tableCreated = false; SQLiteDatabase db; @Override public void onCreate(Bundle savedInstanceState) { super.onCreate(savedInstanceState); setContentView(R.layout.activity_main); final EditText databaseNameInput = (EditText) findViewById(R.id.databaseNameInput); // EditText 값 불러옴 final EditText tableNameInput = (EditText) findViewById(R.id.tableNameInput); Button createDatabaseBtn = (Button) findViewById(R.id.createDatabaseBtn); createDatabaseBtn.setOnClickListener(new OnClickListener() { //누르면 이벤트 발생 public void onClick(View v) { databaseName = databaseNameInput.getText().toString(); createDatabase(databaseName); // createDatabase함수 실행 } }); Button createTableBtn = (Button) findViewById(R.id.createTableBtn); // 위와 같음 createTableBtn.setOnClickListener(new OnClickListener() { public void onClick(View v) { tableName = tableNameInput.getText().toString(); createTable(tableName); int count = insertRecord(tableName); println(count + " records inserted."); } }); status = (TextView) findViewById(R.id.status); } private void createDatabase(String name) { //여기서부터 createDatabase 함수 println("creating database [" + name + "]."); try { db = openOrCreateDatabase( name, MODE_WORLD_WRITEABLE, null); //데이터베이스 생성 databaseCreated = true; //정상적이면 true println("database is created."); } catch(Exception ex) { ex.printStackTrace(); println("database is not created."); // 아니면 false } } private void createTable(String name) { //여기서부터 createTable println("creating table [" + name + "]."); db.execSQL("create table if not exists " + name + "(" + " _id integer PRIMARY KEY autoincrement, " + " name text, " + " age integer, " + " phone text);" ); //테이블 생성 tableCreated = true; } private int insertRecord(String name) { println("inserting records into table " + name + "."); int count = 3; db.execSQL( "insert into " + name + "(name, age, phone) values ('John', 20, '010-7788-1234');" ); db.execSQL( "insert into " + name + "(name, age, phone) values ('Mike', 35, '010-8888-1111');" ); db.execSQL( "insert into " + name + "(name, age, phone) values ('Sean', 26, '010-6677-4321');" ); return count; } private void println(String msg) { Log.d("SampleDatabase", msg); status.append("\n" + msg); } @Override public boolean onCreateOptionsMenu(Menu menu) { // Inflate the menu; this adds items to the action bar if it is present. getMenuInflater().inflate(R.menu.main, menu); return true; } }
|